


|
This FAQ is suitable for: N300RU |

STEP-1: Accessing Web page
1-1.Connect to the Router by typing 192.168.1.1 in the address field of Web Browser. Then press Enter key.

1-2. It will show up the following page that requires you to enter valid User Name and Password:

Enter admin for User Name and Password, both in lower case letters. Then click Log In button or press Enter key.
STEP-2: Printer server setting
2-1. Click USB Storage->Printer Server, and select Enable.Now the setting on the Router for printer server is finished.

2-2. Before you use this function, please make sure:
● All the computers connected to this router have installed Printer Driver. If not, please install it first. (Please Refer to How to Install Printer Driver)
● Your Printer must be an USB Printer that can be connected to the router.
STEP-3: Go to the printer server interface
If all that are ready, please click Start Server button to share the printer service connected to the USB port of router.
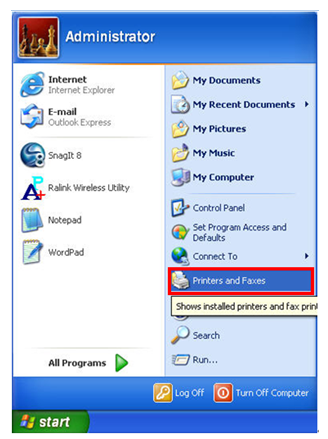
3-1. Click Start—Printers and Faxes:
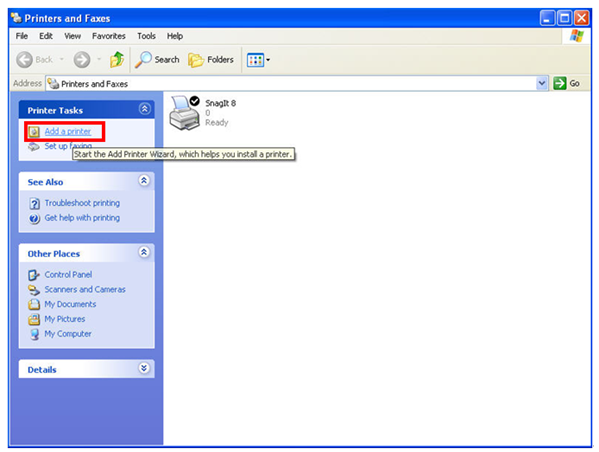
3-2. Click Add a printer on the left:
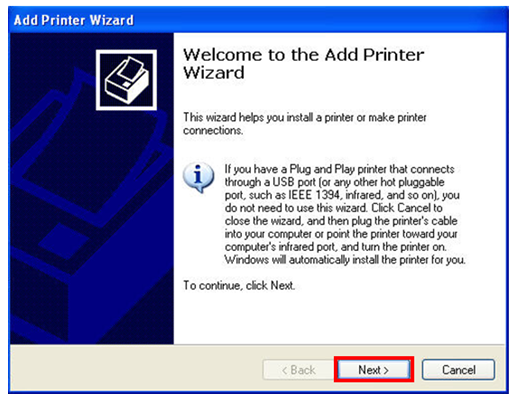
3-3. Click Next while it comes out the welcome interface as below.
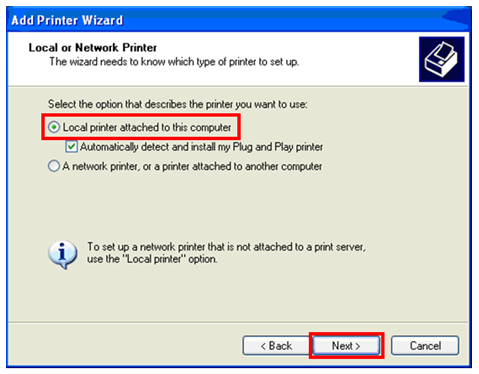
3-4. Choose “Local printer attached to this computer” and click Next.
3-5. Select “Create a new port” and choose “Standard TCP/IP Port” for type of port. Click Next.
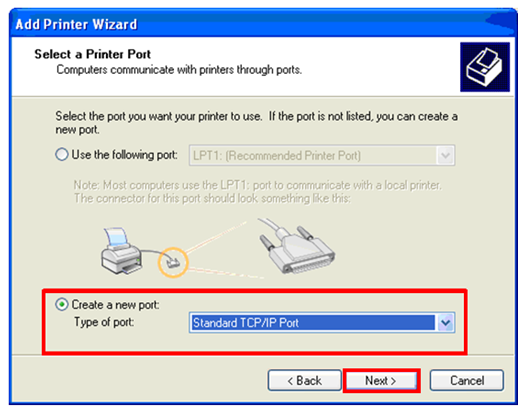
3-6. Please click Next on below window.

3-7. The most important: please type in the gateway of your wireless router, by default, it is 192.168.1.1 for TOTOLINK wireless router.
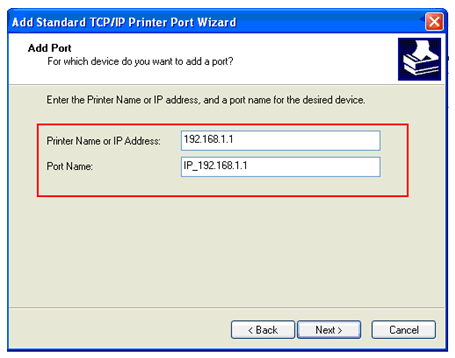
3-8. Now you have to select the right Printer Manufacturer and model number and install it.
Note: Make sure the Printer has been plugged into the USB port of router, else it will show you that there isn’t any printer founded.
3-9. After installation, you can share the USB Printer connected to your router.
If you don’t want to share your Pinter any more, just choose Disable in the printer server interface.